Scenes
A Scene is a container for objects and scripts. Scenes can be stored on disk in JSON and loaded at any time. The content of a scene includes:
- Objects (Mesh3D, Image2D, Lights, Particles, etc.)
- Scripts (scene-level Lua scripts)
- Shaders (post-processing effects)
- Camera position and rotation
- ADS lighting configuration
- Physics setup (gravity, substeps...)
Creating a New Scene
When you launch Brakeza3D, it starts with an empty scene. To create a new scene from scratch:
- If you have objects in the current scene, save it first or create a new project
- The empty scene is your blank canvas to start building
Adding Objects to a Scene
There are multiple ways to add objects to your scene:
| Method | Description |
|---|---|
| Menu | Use Add Object menu to add primitives, lights, models, or empty objects |
| Scripts | Create objects programmatically using ObjectFactory |
Scene Objects Widget
The Scene Objects window (Window → Scene Objects) displays all objects currently in the scene as a hierarchical list:
- Click an object to select it
- Double-click to focus the camera on it
- Right-click for context menu options
Managing Scenes
Scenes are managed through the File Browser window (Window → File Browser). Navigate to the Scenes section to browse, load, save, or delete scenes.
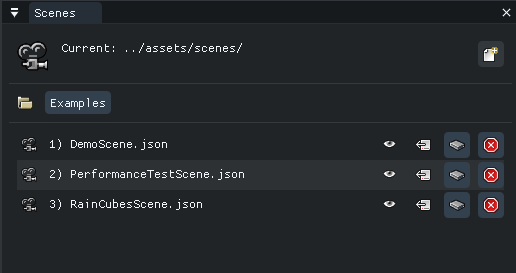
| Action | Description |
|---|---|
| Info | View scene details (objects, scripts, settings) |
| Load | Load the scene into the editor |
| Save | Save current scene to this file |
| Delete | Remove the scene file from disk |
Scene Detail Widget
By clicking on Detail scene, we can view the detailed contents of the scene.
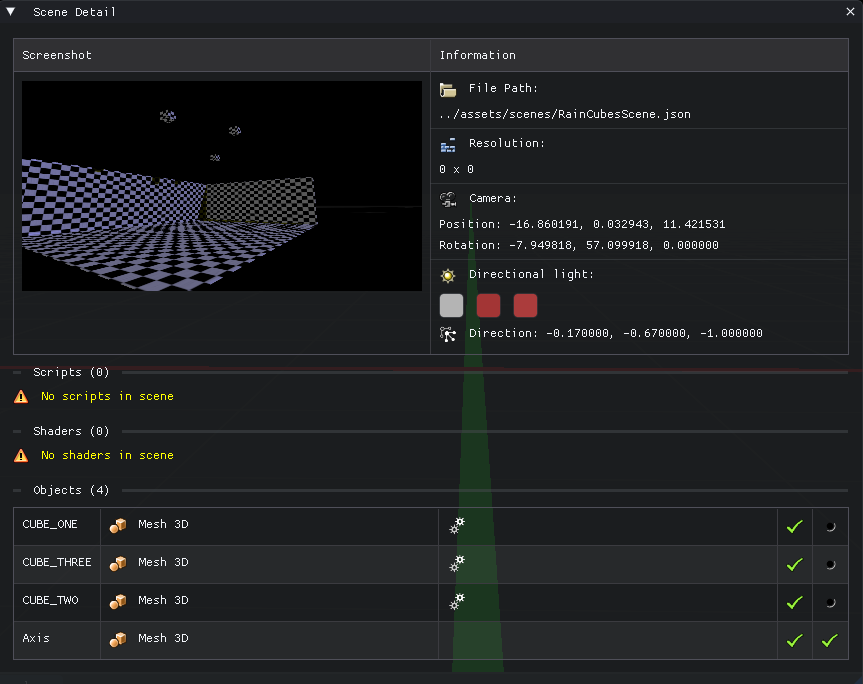
The detail view shows:
- List of all objects in the scene
- Attached scripts and shaders
- Camera position
- Lighting configuration
Saving a Scene
To save your current work:
- Open Window → File Browser
- Navigate to the Scenes section
- Click the Save button on an existing scene to overwrite it
- Or type a new name and click Save As to create a new scene file
Scenes are saved as JSON files in assets/scenes/.
What Gets Saved
| Element | Saved | Notes |
|---|---|---|
| Objects | Yes | Position, rotation, scale, properties |
| Scripts | Yes | File paths and enabled state |
| Shaders | Yes | Post-processing chain |
| Camera | Yes | Position and rotation |
| Lighting | Yes | ADS components and direction |
| Physics | Yes | Gravity, substeps settings |
Loading a Scene
To load an existing scene:
- Open Window → File Browser
- Navigate to the Scenes section
- Select the desired scene and click Load
Loading a scene will replace all current objects. Save your work first!
Loading Scenes from Scripts
You can also load scenes programmatically:
function onStart()
    -- Load a scene
    Components:Render():getSceneLoader():LoadScene("../scenes/MyLevel.json")
end
Scene Workflow
Typical Development Workflow
- Setup: Create a new project, configure global settings
- Build: Add objects, position them, configure properties
- Script: Attach scripts to objects and the scene
- Test: Press Play to test your scripts
- Iterate: Stop, make changes, test again
- Save: Save both scene and project regularly
Multi-Scene Projects
For larger projects with multiple levels:
- Create a main menu scene with UI and navigation
- Create level scenes for gameplay
- Use project scripts to manage scene transitions
- Use global variables to persist data between scenes
Example scene transition script:
-- In a project script
function LoadNextLevel()
    currentLevel = currentLevel + 1
    local scenePath = "../scenes/Level" .. currentLevel .. ".json"
    Components:Render():getSceneLoader():LoadScene(scenePath)
end
Scene Scripts vs Object Scripts
| Type | Scope | Variables | Use Case |
|---|---|---|---|
| Scene Scripts | Global to scene | Shared between scripts | Game managers, UI controllers |
| Object Scripts | Per-object instance | Isolated per object | Object behavior, AI |
Adding Scene Scripts
- Open Window → Project Setup
- Expand Scene scripts
- Drag a script from the File Browser (Scripts section)
Scene scripts run independently of any specific object and are ideal for:
- Game state management
- Score tracking
- Level logic
- Camera control
Scene Configuration
Camera Settings
Configure the scene camera through Camera menu:
| Setting | Description |
|---|---|
| FOV | Field of view angle (default: 90) |
| Far Plane | Maximum render distance |
Lighting Settings
Configure through Illumination menu:
| Setting | Description |
|---|---|
| Ambient | Base light color |
| Diffuse | Main light color |
| Specular | Highlight color |
| Direction | Sun direction vector |
| Shadows | Enable/disable shadow mapping |
Physics Settings
Configure through Colliders menu:
| Setting | Description |
|---|---|
| Gravity | World gravity (default: -9.8 on Y) |
| Substeps | Physics simulation precision |
| Debug | Visual collision debugging |
Tips and Best Practices
- Save frequently: Brakeza3D doesn't auto-save
- Use meaningful names: Name your objects descriptively for easier scripting
- Organize with hierarchy: Use parent-child relationships for complex objects
- Test incrementally: Test after each major change
- Backup scenes: Keep copies of working scenes before major changes